garageSTAR Skid Plate Group Buy for NA Miata |

garageSTAR Skid Plate Group Buy for NA Miata |
 Jun 2 2011, 09:39 PM Jun 2 2011, 09:39 PM
Post
#1
|
|
 Advanced Member  Group: Sponsors Posts: 257 Joined: 22-December 09 From: Sacramento, California Member No.: 198  |
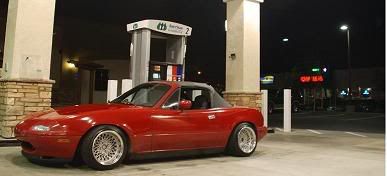
The past few months I have had customers ask me to make a skid plate. Well here it is! This BOLT ON skid plate is made of 1/4 inch steal for a NA Miata 90-97. The plate will come powder coated to resist rusting. The hardware will include stainless countersunk Allen bolts, lock washer, and nuts so you wont have any issues with removing the plate.
Time frame. The design has been send to the machine shop this morning. Should take about a week to get back. I will test fit the first batch before sending them to powder coating. Powder coating takes 3 days. I give it 2 weeks tops. Oil pans run around $45-$50 and is a pain to replace. If you have broken your pan once you will most likely break it again. Save money, time and headache. ***The plate will not work unless you raise the motor*** I don't know if the fit NB's but I will test fit it once I get the batch made. Here's the pricing. First 25 people or whoever is on the list when the parts are done will get the special pricing. I am only making 25 to test the market. If it goes well I will make more. MSRP - $85 Shipping is included within the USA Group Buy Price - $70 Shipping is included within the USA  Please fill out the form so when they are done I will send a invoice for payment. Please email the form to garagestar@gmail.com Name - Email - Product - Garage Star skid plate NA 1. garageSTAR 2. Rus 3. mad doc (ClubRoadster.net) 4. nasubi (ClubRoadster.net) 5. jdmfc3s90 (ClubRoadster.net) 6. Angelsandbombs (ClubRoadster.net) 7. red_rocket_na (ClubRoadster.net) 8. JonB (ClubRoadster.net) 9. John lopez (ClubRoadster.net) 10. booyaka (ClubRoadster.net) 11. soaringroadster (ClubRoadster.net) 12. Ham (ClubRoadster.net) 13. Echonova (ClubRoadster.net) 14. FABEL (ClubRoadster.net) 15. Venice (ClubRoadster.net) 16. 17. 18. 19. 20. 21. 22. 23. 24. 25. Possible NB Group Buy 1. DazedAndConfused 2. Josh Guillot 3. anrandol 4. tanakapz 5. 6. 7. 8. 9. 10. 11. 12. 13. 14. 15. 16. 17. 18. 19. 20. 21. 22. 23. 24. 25. -------------------- |
 |
 
|
 |
|
Sep 8 2011, 03:55 PM
Post
#2
|
|
|
Advanced Member Group: Sponsors Posts: 257 Joined: 22-December 09 From: Sacramento, California Member No.: 198 |
In case you don't know how to raise your motor here is the DIY that Harry did.
Foreward, So after a bunch of people kept asking me how to go about raising their motor through pm, text, phone call or person I thought this is getting silly. I would always have the same problem of not having a photo or graphic to reference and with each person I had to start from scratch with the explanation. The concepts and process are really simple, but it can become complicated trying to explain it. So finally i said fuck it, i'm going to make a write-up. and here is that write-up  ________________________________  On the quest for low but tired of cracking your pan?? well raise your motor dummy!! why didn't you think of that?? its FOR YOUR HEALTH! This is a GENERAL guide to lifting a motor in a miata. There is more than one way to eat a hamburgar, but this is loosely how i raised mine ('92) I do not take responsibility for you facking your shizz and such as. ________ Let's begin with motor mounts. Stock mounts have a rubber bushing in the middle and have studs coming out the top and bottom. refer to photo. stock mount on left, mazdaspeed/mazda comp mount on right.  The (2) motor mounts come down and away (diagonally) from the motor, to the left and right of the motor. The bottom of the mount attaches to the subframe and the top attaches to a bracket. That upper bracket then attaches to the motor. It is somewhere in this area that we want to add spacers. I put my spacers (big washers) in between the motor mount and the subframe. Refer to photo below. Note also that i removed the metal "cup" that surrounds the mount. This is not required, but if you do, keep in mind that the "cup" itself acted as a spacer and will need to be compensated for if removed.  Now this does not mean you can not put your spacers somewhere else, or some combination of more than one spot. I have seen spacers between the motor and upper bracket and that seemed to work. I leave it up to you to decide what will be the best spot(s) to add spacers. The concept is still the same. ____________________________ Lets address the subframe now.  The 2 motor mounts sit on top on the subframe (in a diagonal position) This creates a "v" shape in the subframe where the motor mounts, mount. For the NA chassis, afaik, one mount location is a hole (just big enough for the motor mount stud) and the opposite side is slotted. Now, since we are adding spacers to the motor mounts at some point, we are essentially making the motor mount longer. Since the mounts are longer, if the mounts stayed in the stock location on the subframe, that would just be squeezing the motor together. But, if we allow the mounts to move, we can move the motor up, instead of squeezing it. Since the mounts come into the subframe in a "v" they need to move UP AND OUT to raise the motor.  A solution to this is to slot the side of the subframe that has only a hole for the mount. Its rather convenient because there is another hole directly up from the stock hole. You should be able to see this in the photo. I just took a cut-off wheel to the metal in between those 2 holes. Cut only enough metal to allow the mount to move freely up and down. No need for any extra play.  I did this cutting with subframe out of the car. _______________________ Great, we know where to add spacers and the motor will be able to move upwards. I need to jump back to the motor mounts though. If you added spacers where i did (between the mount and subframe) you will quickly find out we have another problem. the more "spacers" we add or the more we "space" the motor, the less thread from the motor mount will be coming through the subframe.  as with most things there is more way, there is more than one solution. Which solution did use? the easy, somewhat shady one of course! On the underside of the of the subframe, the motor mount is attached to the subframe with a nut and washer.  I removed the washer to make up for the threads i had lost. This is NOT the right solution, nor im I proud of it, but it worked... That said, there are other solutions. 1. Add spacers to both sides of the motor mount (between mount and subframe AND between mount and upper bracket) this divide up the thread that is being "lost". 2. Add spacers between the upper bracket and motor. I have not done this, but i have seen photos (i believe breezy did it?) anyways, since the upper bracket is mounted to the block with bolts you could theoretically space as much as you want with the addition of longer bolts. 3. Run a different motor mount. There are solid mounts that use bolts on either end of the mount or "all-thread" could run all the way through. With any kind of mount like this, one could as much "spacing" desired and just use bolts or all-thread that are the appropriate length. 4. another method, there is always another way. . . . And thats it folks! I hope it helped explains things/made them clearer. Happy slamming, Hugs and kisses, Harry -------------------- |
|
|
|
garageSTAR garageSTAR Skid Plate Group Buy for NA Miata Jun 2 2011, 09:39 PM etikoner I don't think I'm getting this, but i just... Jun 3 2011, 03:56 PM
 garageSTAR Sorry for the crappy picture. This is all I can fi... Jun 3 2011, 04:09 PM kfed Drilling through the subframe is a PITA. I like th... Jun 3 2011, 09:33 PM Zach I wish I still had my Miata JUST for this part. SO... Jun 4 2011, 05:48 PM Ivan the Terrible Drilling through the subframe isn't hard with ... Jun 4 2011, 06:29 PM AngelsAndBombs Well it IS going on a Miata, so yes, lube is a mus... Jun 5 2011, 01:07 AM stan QUOTE (Zach @ Jun 4 2011, 10:48 AM) I wis... Jun 5 2011, 04:31 PM garageSTAR Just remember guys. This is a limited run of 25. I... Jun 5 2011, 06:36 PM garageSTAR Here are a few pictures from the other day test fi... Jun 17 2011, 06:36 AM etikoner Damn it looks great. Making me wanna raise my engi... Jun 17 2011, 07:21 PM garageSTAR Better hurry. The group buy will end next week as ... Jun 17 2011, 07:29 PM etikoner Erick Arauz - etikoner - slamburglars
When will ... Jun 19 2011, 07:42 AM garageSTAR Hi Erick Arauz. Please fill out the form and email... Jun 19 2011, 03:19 PM garageSTAR Skid plates are done and hardware has arrived. I a... Jun 21 2011, 10:59 PM SkinnyRoadster You should add a non powdercoat option. I mean, it... Jun 22 2011, 07:18 AM garageSTAR I did set aside a few non-powder coated skid plate... Jun 22 2011, 04:14 PM garageSTAR Test fit went great on Stuart's NB. Everything... Jun 25 2011, 01:59 AM garageSTAR Group buy has been over for a while but thought I... Sep 7 2011, 04:29 PM kfed Hey Ken, do you still have these available? I need... Sep 8 2011, 04:02 PM garageSTAR I do have them in stock. You do have to drill but ... Sep 8 2011, 04:05 PM kfed Drilling through the subframe must be fun, is ther... Sep 8 2011, 04:31 PM garageSTAR $70 shipped. I will supply you with drill bit... Sep 8 2011, 04:36 PM garageSTAR Your box is full. My Paypal is garagestar@gmail.co... Sep 8 2011, 06:09 PM kfed Payment sent. Sep 8 2011, 06:16 PM etikoner Mine's still sitting on my shelf, I will put i... Sep 8 2011, 09:43 PM TUXSUX You still selling these man? Apr 20 2012, 04:15 PM garageSTAR Yep!
http://garagestar.com/shop/skid_plate_mia... Apr 20 2012, 04:20 PM TUXSUX Ordered mine today! Stoked on getting it May 31 2012, 08:17 PM garageSTAR I just packed your order. It's going out in 15... May 31 2012, 08:44 PM lowlifeNA Will be orderin real soon Jun 8 2012, 07:53 PM garageSTAR Dope!
QUOTE (lowlifeNA @ Jun 8 2012, 12... Jun 8 2012, 08:31 PM
garageSTAR Sorry for the crappy picture. This is all I can fi... Jun 3 2011, 04:09 PM kfed Drilling through the subframe is a PITA. I like th... Jun 3 2011, 09:33 PM Zach I wish I still had my Miata JUST for this part. SO... Jun 4 2011, 05:48 PM Ivan the Terrible Drilling through the subframe isn't hard with ... Jun 4 2011, 06:29 PM AngelsAndBombs Well it IS going on a Miata, so yes, lube is a mus... Jun 5 2011, 01:07 AM stan QUOTE (Zach @ Jun 4 2011, 10:48 AM) I wis... Jun 5 2011, 04:31 PM garageSTAR Just remember guys. This is a limited run of 25. I... Jun 5 2011, 06:36 PM garageSTAR Here are a few pictures from the other day test fi... Jun 17 2011, 06:36 AM etikoner Damn it looks great. Making me wanna raise my engi... Jun 17 2011, 07:21 PM garageSTAR Better hurry. The group buy will end next week as ... Jun 17 2011, 07:29 PM etikoner Erick Arauz - etikoner - slamburglars
When will ... Jun 19 2011, 07:42 AM garageSTAR Hi Erick Arauz. Please fill out the form and email... Jun 19 2011, 03:19 PM garageSTAR Skid plates are done and hardware has arrived. I a... Jun 21 2011, 10:59 PM SkinnyRoadster You should add a non powdercoat option. I mean, it... Jun 22 2011, 07:18 AM garageSTAR I did set aside a few non-powder coated skid plate... Jun 22 2011, 04:14 PM garageSTAR Test fit went great on Stuart's NB. Everything... Jun 25 2011, 01:59 AM garageSTAR Group buy has been over for a while but thought I... Sep 7 2011, 04:29 PM kfed Hey Ken, do you still have these available? I need... Sep 8 2011, 04:02 PM garageSTAR I do have them in stock. You do have to drill but ... Sep 8 2011, 04:05 PM kfed Drilling through the subframe must be fun, is ther... Sep 8 2011, 04:31 PM garageSTAR $70 shipped. I will supply you with drill bit... Sep 8 2011, 04:36 PM garageSTAR Your box is full. My Paypal is garagestar@gmail.co... Sep 8 2011, 06:09 PM kfed Payment sent. Sep 8 2011, 06:16 PM etikoner Mine's still sitting on my shelf, I will put i... Sep 8 2011, 09:43 PM TUXSUX You still selling these man? Apr 20 2012, 04:15 PM garageSTAR Yep!
http://garagestar.com/shop/skid_plate_mia... Apr 20 2012, 04:20 PM TUXSUX Ordered mine today! Stoked on getting it May 31 2012, 08:17 PM garageSTAR I just packed your order. It's going out in 15... May 31 2012, 08:44 PM lowlifeNA Will be orderin real soon Jun 8 2012, 07:53 PM garageSTAR Dope!
QUOTE (lowlifeNA @ Jun 8 2012, 12... Jun 8 2012, 08:31 PM |
| Lo-Fi Version | Time is now: 17th September 2026 - 03:09 PM |